There’s no denying the importance of saw horses on a construction site. They are used for more than the obvious, being handy for things such as storing materials safely off the ground, painting trim stock, making a plan table or setting staging to increase the carpenter’s reach. That may be why my Grandfather Russell Van Lieu called them carpenter horses rather than saw horses. Most of the horses I see on job sites these days show little thought and are clearly made as quickly as possible, often to be left on site when the job is done. Others are folding plastic horses that fit nicely in the van, but offer little of the utility of a good set of wood horses. I’ve gotten some nasty pinches folding those up, so they are not high on my list.
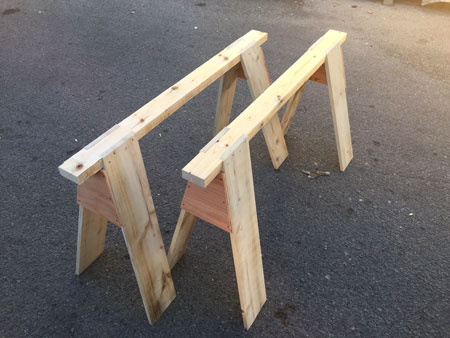 Russell’s horses had dimensions tailored for their purpose. They stood 24″ tall, short by today’s standards. The height was determined by the need to provide elbow room for hand sawing. The same height was used for all of my father’s horses as well. He was a dedicated user of the Skil Model 77 worm drive, but still did hand sawing for all of his finish work, using a Makita chop saw only toward the very end of his career. The stance was 16″ wide so the legs could be tacked to floor joists before deck boards were installed. This was before plywood decks, when the subfloor was most often yellow pine T&G, set diagonally. There was no throwing on one sheet of ply to set the horses on. The legs were set on an angle, the tops being 4″ in from the ends and the bottoms aligned with the end of the back. This makes the horse stable when loaded right to the very end, not inclined to flip over. This I much appreciate when standing on them!
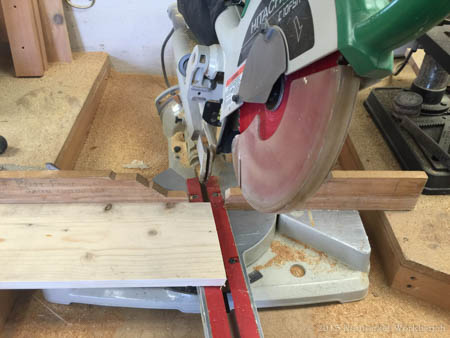 The legs are beveled on a compound miter saw, with the angles being determined by the width of the stance and the 4″ offset from the ends. All of the legs are cut the same in spite of the appearance of left and right ones. I have been using spruce 1″ x 6″ although there are certainly stronger choices. My grandfather and father used yellow pine, not easily available to me. I have loaded my horses with a lot of framing stock when it was time to cut rafters and never had a failure or even weakening. I’ve been considering using red balau (the so-called Phillipine Mahogany) for legs as I imagine it would be very strong and there are lifts of it right around the corner of the shop. Two-toned horses would be distinctive, that’s for sure!
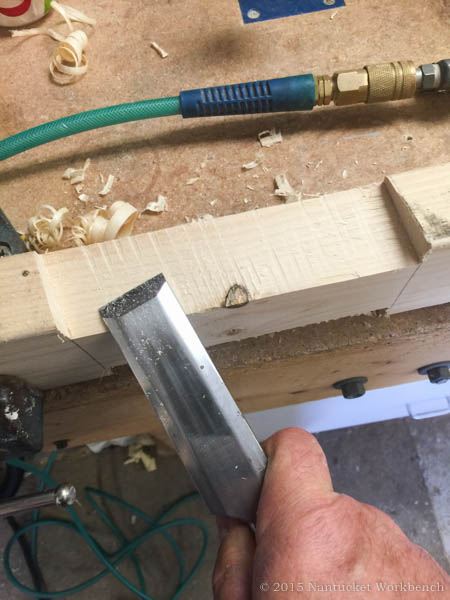
 The legs are mortised into the backs for additional rigidity. When legs are only nailed or screwed to the outer edges of the backs, they rely entirely on the shear strength of the fasteners to hold their positions. When they are mortised into the backs, considerable mechanical advantage is gained. The tops of the backs are cut to a depth matching the leg thickness while the underside is shallower, with the resulting angle once again determined by the 16″ spread of the feet. How to make these cuts? I’ve done it three different ways, all of them involving multiple saw cuts to remove stock and leave easily cleaned remnants. My first horses I cut with a hand saw. Now I use either a compound miter saw or a table saw with a miter gauge. My preference is the table saw as it is meant for continuous running, whereas it feels abusive to run the compound miter saw for such long periods as required by the eight mortises in a brace of horses.
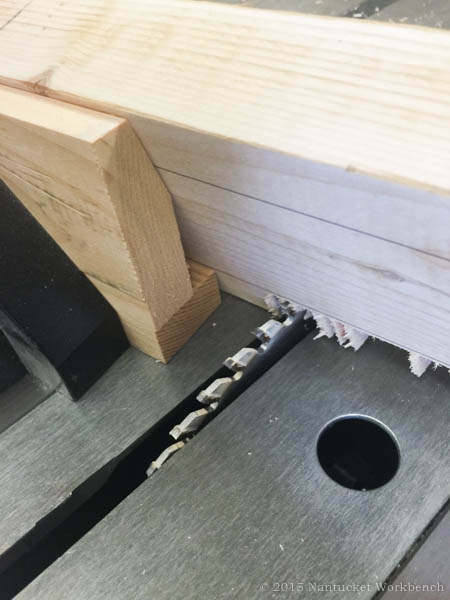 I use a jig to keep the 2″ x 4″ back at the proper angle. Then it’s simply a matter of making repetitive cuts, removing as much material as I have the patience for. It’s possible to remove all of it, but this is my least favorite part of the process, so I’d rather get it over with by leaving some to be cleaned out with a sharp chisel.
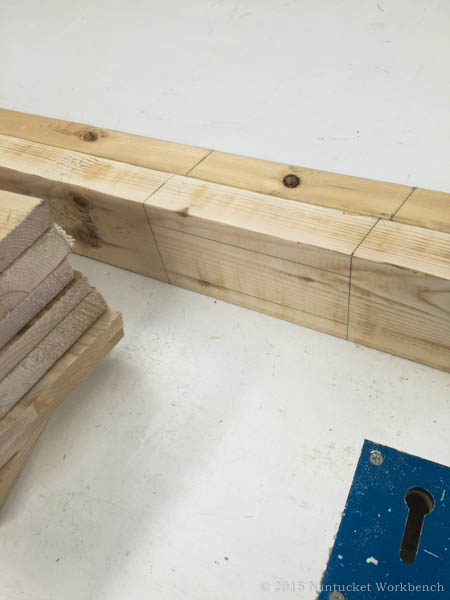
 The rough mortises ready to be smoothed.
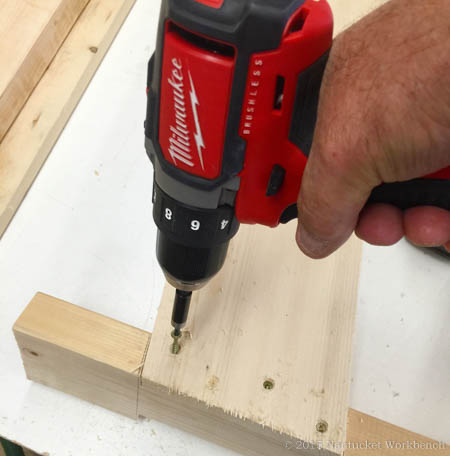 There are several differences in the horses I make and the ones Dad and Granddad made. One is that I use screws instead of nails to fasten the legs. An advantage is that over time, nails can loosen, requiring a few whacks with a hammer. Not particularly effective. Much better to be able to tighten some screws occasionally.
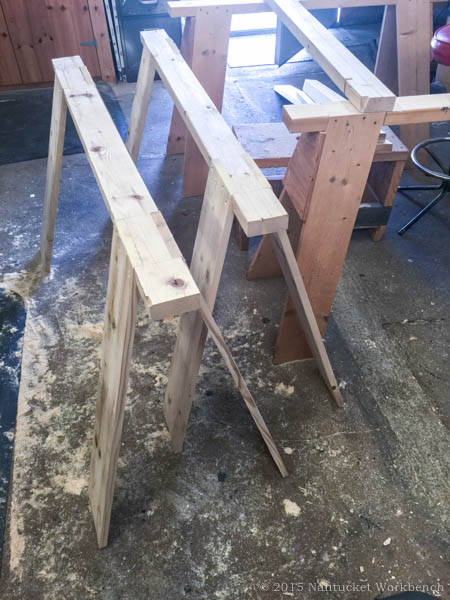 The horses with all the legs on, leaving only the plywood gussets to finish the set. These are also attached with screws, convenient if you’ve been victimized by inferior CDX plywood like I have.
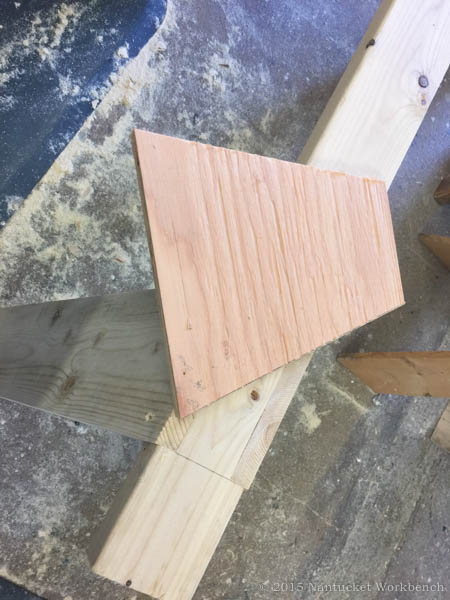 The gussets that hold the legs in position. If the 2′ x 4″ back has a slight twist, the gussets can be used to compensate.
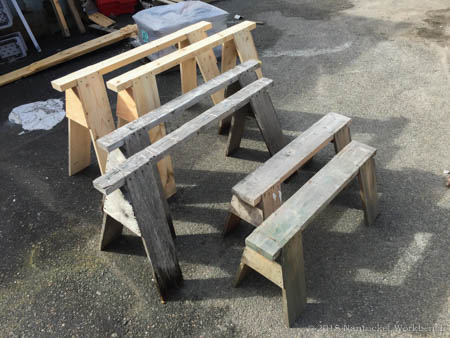 A mixed herd of horses. Most of the horses I use these days are 30″ high for more comfortable cutting with power saws. Those in the middle are 24″ ones because I still do a lot with my hand saws. The ponies are primarily for planks to bring me up to ceiling height. I much prefer to be able to walk back and forth along planks to tape ceilings or work crown molding rather than constantly moving step ladders.
I no longer have any 4′ high horses. They were a staple on our job sites until a few years ago. We would stack and tack them (with planks between), capping them with the 2 footers, creating a quick and easy 10′ high stage. That would probably be seen as a revenue generator by OSHA, so they went to a fireplace.
There is an expectation that I share with my forebears. You will not cut my carpenter horses! That was very nearly a firing offense with my Dad. And you will not sit idly during a break, pounding nails in them, or whacking in staples. I like to keep them clean and smooth so they don’t mark up finish materials. I even sand them occasionally.
Not many people want to make horses like this any more, but they sure like to borrow them. I wouldn’t mind making a pair for folks now and then, but there would probably be liability issues and I’d have to have warning labels printed and affixed. They work as well as they ever did, so I’ll make sure I always have some.
-dvl
That would involve some interesting shipping! But of course I would be glad to build you a pair.
I have been thinking of asking you to build a pair for me for some time now.