 When Milwaukee announced their new cordless mag drills in April of this year, it was the first time I had even heard of such a tool. Being a woodworker, my contact with steel had been limited to the occasional I-beam in residential construction, steel that needed holes so wood framing materials could be bolted to it. More than once I ran into beams that had jagged holes burned into them with acetylene torches. With any luck, the burned holes would be big enough to allow the bolts to pass through, but sometimes the jagged edges would ruin the threads on the bolts. Now I know the right way to do it! And I know that steel beams and HSS columns in residential construction are now common, at least here on Nantucket. Ever larger room spans call for deep steel girders, steel posts and associated I-beams. Vaulted ceilings without collar ties use steel ridges to run unsupported from gable to gable. These warrens of metal aren’t very receptive to nails, so wood framing members must be attached to two, three and sometimes four sides of the beams to provide the nailing.
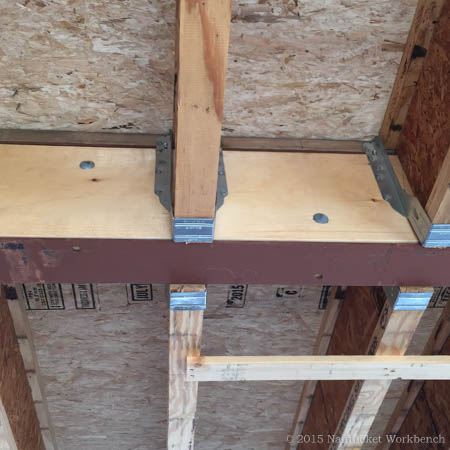 Some of the drilling in these steel members can be relatively inexact as long as the size of the holes and their locations don’t affect the strength, but some of the bores for steel to steel connections have to be right on the money or the pieces won’t go together. What used to be a nearly exotic application is now just about an every day event. This makes Milwaukee’s mag drill a good tool for a builder, framing crew, electrical contractor or plumber. Anyone, in fact, that has to attach to or go through ferrous metals.
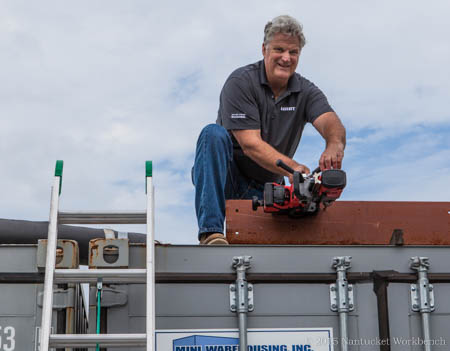 My first test of the magnetic drill was on an angled piece of steel to be bolted to the concrete edge of a loading dock. It was about ⅜” thick and on top of a shipping container. I climbed up with the 30 lb. tool and stuck it to the side of the steel. Here the first advantage of Milwaukee’s permanent magnets revealed itself: the magnets are rotated with a knob on the rear of the machine. Turn the knob a little, and you get a little of the magnetic force. This allows most of the weight of the tool to be supported but still allows enough movement for precise positioning. Turn the knob the rest of the way and you get the full force.
With the drill solidly stuck on, I tried my first holes. Unfortunately the generic twist bit wasn’t as new or as sharp as I thought, so it slowed the process some and allowed some wandering. Using it was a bit of a disservice to Milwaukee and our readers. Later bores with a new bit were easy, fast and dead on.
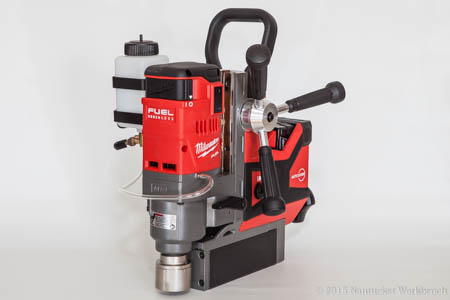
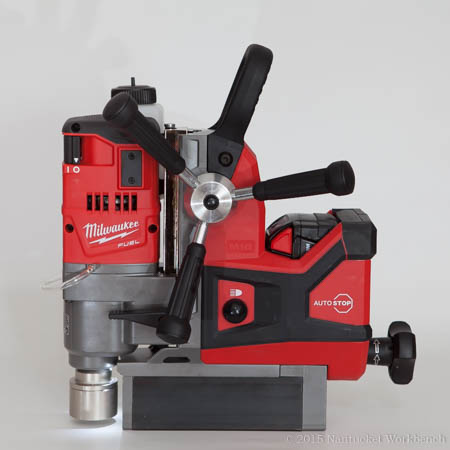
 The Mag Drill’s feed handle can be mounted on either side. A push of a button in the center of the handle releases it. The right side of the machine shows the speed selector switch, giving a choice of 400 RPM for annular cutters and 690 for twist drills.
There are small metal plates to the rear of the power switch for mounting the magnetic oil bottle to either side. A few words about that internal oiler: The manual says “Do not use cutting fluid in an overhead position that allows cutting fluid to enter motor or switch enclosure.” Remember that gravity feeds the oil around the arbor to the cutter. If it’s upside down, it’s going back into the machine. Those cool pictures on the Milwaukee web site showing the oil bottle mounted high above an inverted machine suggest trouble!
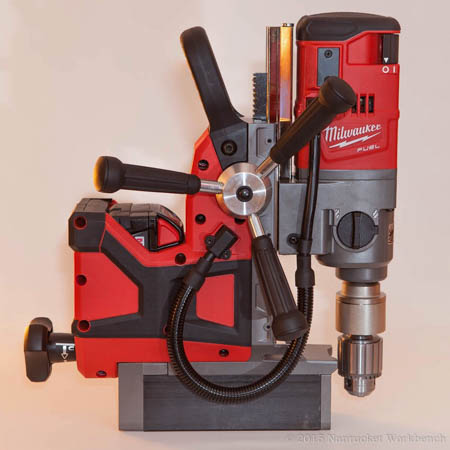
 The Weldon chuck on the drill accommodates the largely preferred annular cutters, but if twist bits are what you’ve got, this kit has you covered with a Weldon-to-½” adapter, shown above. The adapter takes up a lot of the available motor travel, so there is a motor adjustment lever on the machine’s left side. This allows the operator to slide the motor up the rack to make room for standard 6″ twist bits.
On the subject of dull bits; they can cause trouble in more ways than merely wasting time. It’s possible to apply enough force through the feed handle to lift the magnets off the workpiece. I saw the front of the drill start to wobble when I tried to overcome dullness with force. Not something desirable up in the air even with a safety strap. A dull twist bit can also wander off the mark, possibly ruining something difficult and expensive to replace.
 After my self-inflicted troubles, I fit a new bit to the drill and looked for something that needed a couple of holes in it. I found this corrugated steel piling embedded in the ground to ward off errant trucks at the loading dock. It’s about ½” thick and in need of ventilation. The new bit went through quickly and cleanly and stayed precisely on the mark. The proof is in the shavings!
The electricians I drilled for today are going to ask that their boss provide them with one of these, along with Gen 2 M18 Fuel™ ½” Hammer Drill/Drivers after giving mine a run! Good stuff!
I’ll post again about the M18 Fuel™ 1½” Magnetic Drill when I get some annular cutters and an order of steel to hole.
Feel free to comment.
-dvl
Leave A Comment