I was commissioned to make a writing desk for a, well…, a writer. I asked if it needed room for a printer and various computer peripherals, but the answer was no, something just big enough for a laptop, some paper and a few pencils, something to fit in a designated space. A small space it was, so the size given was important within an inch or two. With clear direction, I set about finding suitable materials and thought hard about what new tool this gave me an excuse to add to the shop.
 One of the local lumber yards (yes, we have more than one on this small island) stocks a nice selection of mahogany in various thicknesses and lengths, so I went with a list and came back with some wide 5/4 boards to go with a good stock of ½” x 6″ pieces already in the shop. The 5/4 was to be planed down to ⅞” for the desk top and the ½” boards laminated together for the sides and legs. I find that gluing up layers makes for much more stable parts when relying on local inventory for critical pieces. With careful grain selection, those pieces can create interest and be an element of style, not a work-around.
I knew I wanted maple drawer sides to dovetail into the mahogany front for the color contrast and I wanted to dovetail the table ends to the top as well, so this told me what new shop tool I absolutely had to have. I’m not one to hand cut dovetails, and while I admire the skill involved, I like a router and a good jig. Enter the Leigh D4R-24″ Pro, an adjustable jig that promised to do everything I wanted, and delivered.
The Leigh dovetail jig is a bit on the complex side, with a great deal of adjustability. What this meant to me was that I could lay out the dovetails so I wouldn’t end up with a sliver on one end and a whole tail on the other, and I could make them the width that I wanted, not something one can do on a fixed jig. Fortunately the jig came with a good manual and a DVD, and more fortunately, I had a TV with a DVD player in the shop. I watched the critical parts quite a few times and practiced on a stack of scraps before having at the mahogany.
 I didn’t know it when I started, but the Leigh jig’s ability to cut half-blind dovetails as well as through dovetails would be essential to the method I used to join the ends to the desk top. There’ll be more on that later.
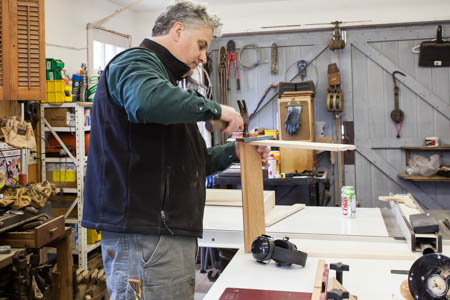
When I made this desk, I wasn’t thinking of blogs or Instagram or Twitter, so I didn’t photograph every step of the way. The sides of the desk were made in a fairly conventional fashion save for the fact that they were made up of two ½” thick pieces of mahogany. The legs were made of three laminations, and because they were not to be a full 1½” square, they were planed equally on two sides so the middle lamination was truly centered. A taper jig for the table saw allowed me to trim the two inside faces of each leg while leaving the outside faces plumb in the Shaker style.
The legs were glued to the sides with biscuits for alignment and pocket screws for a mechanical bond. Belt and suspenders, I know, but I find it effective. The inside faces of the sides were bored with a Kreg jig for attaching the top with pocket screws. Some day I’ll remember to do that before I assemble the sides and legs. It’s a lot easier to do on the Foreman machine than to clamp on the drill guide in a dozen different places!
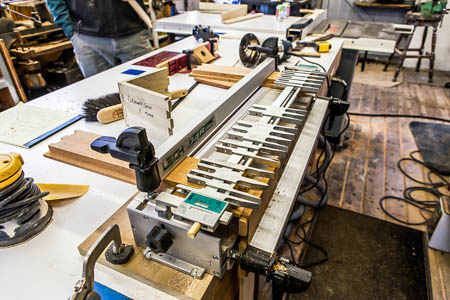
 After a bit of practice routing dovetails, I determined the height of the desk’s drawer sides and laid out the “fingers” of the jig accordingly. In the photo at left, the drawer face is clamped on the top of the jig, bumped up against a scrap acting as a stop. The first two sets of fingers are spaced for the drawer height and the jig is set to cut half blind tails. When both ends are cut in this fashion, the comb is flipped over and the corresponding fingers on the other side now are set to rout the drawer sides.
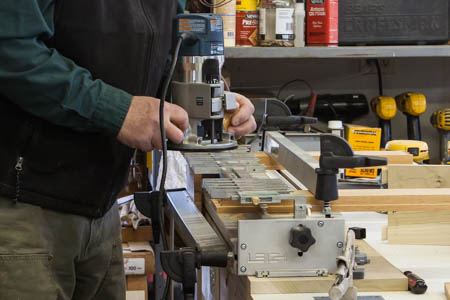 The mantra during the routing was “Don’t pick it up until it stops spinning!” If you pick the router up with a spinning bit you risk putting a mighty nick in the jig fingers (if not your own) and creating a bumpy path for the router bushing to follow.
 If the router is adjusted properly, the dovetails should slide in snugly. Some gentle tapping with a hammer and block put these together nicely.
 One of the reasons for using maple drawer sides with a mahogany front was simply to show off the tails with the color contrast. The benefit of the Leigh jig’s adjustability is evident here. The size and number of the tails and the symmetry of the pins can be determined for any joint that can be fit on the jig.
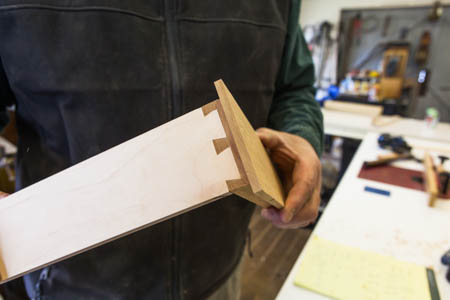
Things got interesting when it came time to do the top. I knew I wanted to cover the end grain of the wide boards and I knew I could biscuit the end pieces, or fasten them with tongues and grooves, but I wanted dovetails. The problem is that dovetails could be cut reliably into the end grain of the boards, but the end pieces would have tails or pins cut with the grain and they would easily pop right off under the slightest tension.
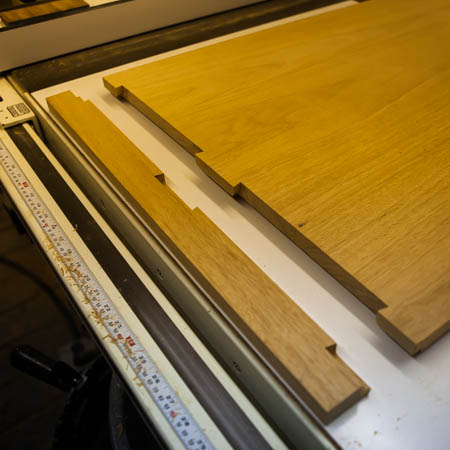 I decided that very wide, half-blind tails would give the look I was after, provide the interlock necessary for attaching the end pieces without fasteners and, most importantly, leave half the thickness of the end boards intact to resist the tension that otherwise might break the tails off. I had to build risers to mount the jig so I could fit the length of the top vertically, so if I ever plan to build a long dining room table in this fashion, I’m going to need a shop with a vaulted ceiling!
 By cutting the much smaller pins into the end grain of the top, I was able to leave the maximum amount of wood for the tails of the end pieces. The half-blind tails provided a lot of gluing surface and a positive fit. Very little sanding was needed to bring all the surfaces flush.
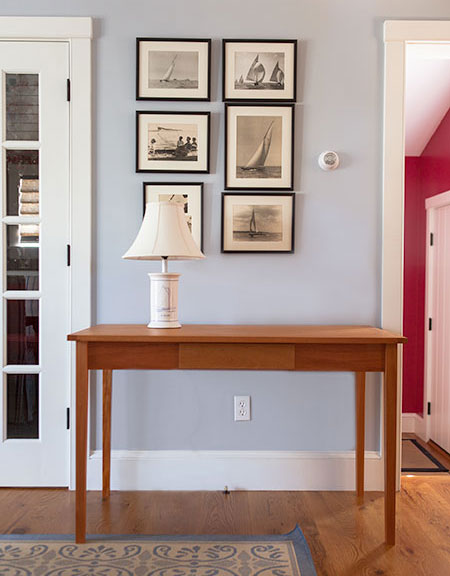
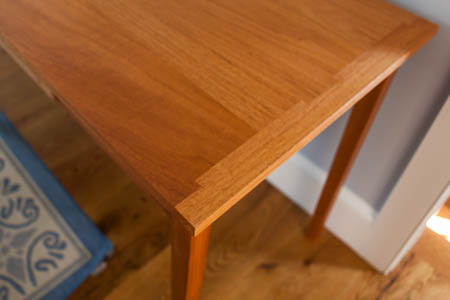 The finished top showing the dovetailed end piece. Some joints I want to disappear and some I want to show!
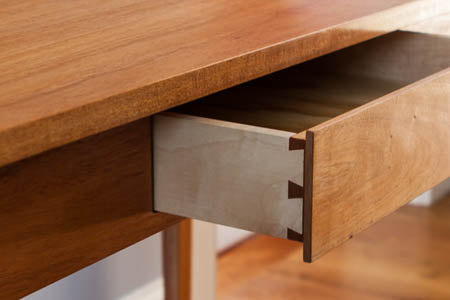 I was going to let the client choose the drawer pull. She decided to leave it off entirely, as the drawer opens easily without.
After these pictures were taken came the hard part, getting it into her car for the trip from Nantucket to New York.
Since you are in effect breadboarding the wide boards, wouldn’t the dovetails prevent wood movement across the wide board and lead to splitting or warpage?
John, there has been nothing like that to date. I’ll check in with the owner periodically to see if there is any movement as you describe.